nip4 9.2.0 is out, and it has a fun new headline feature: a simple integrated paintbox.
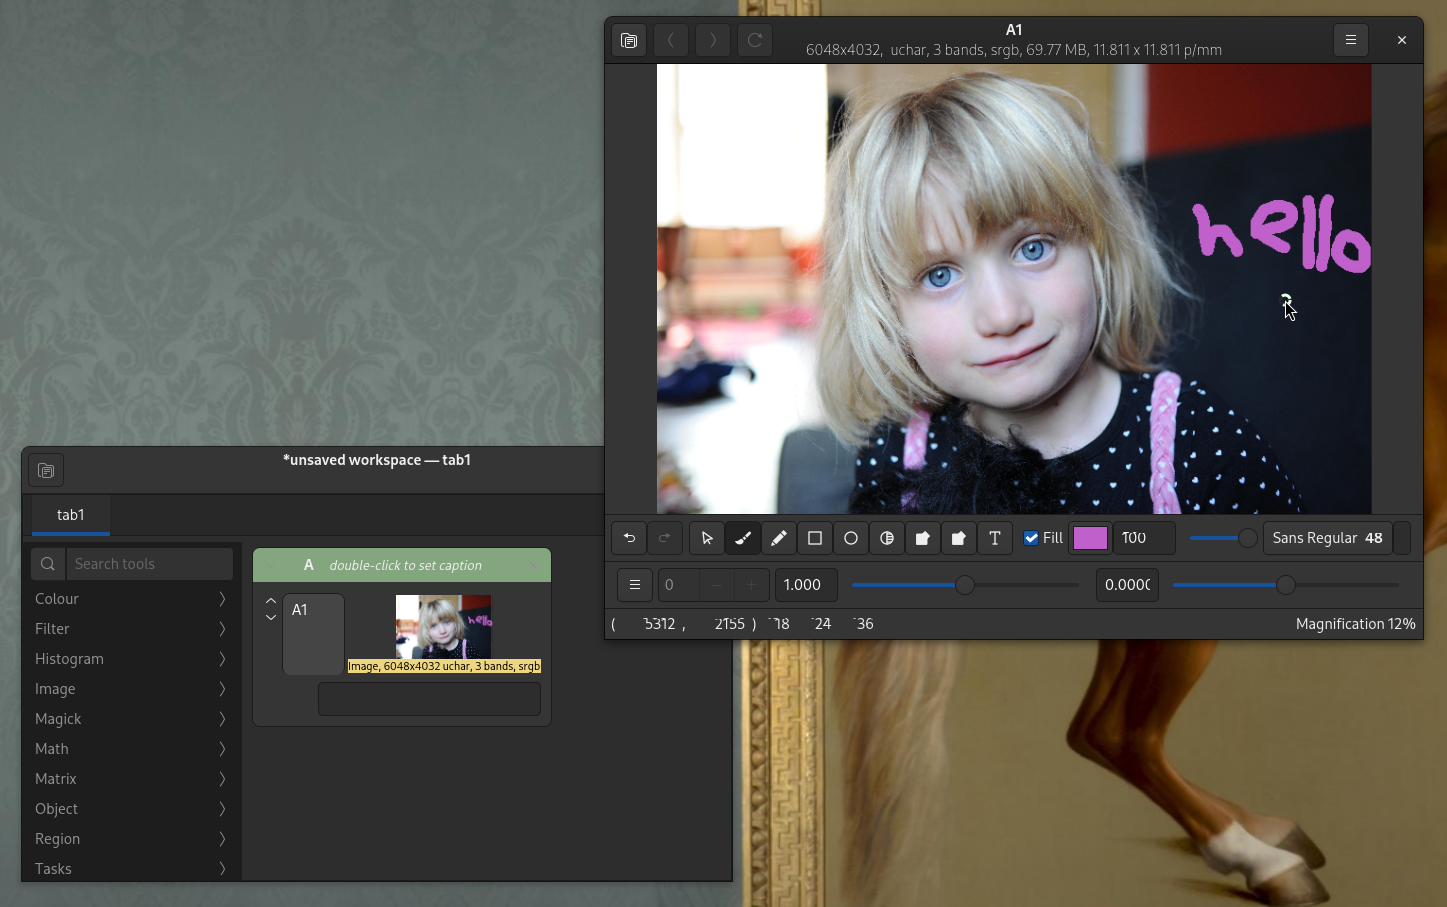
It’s pretty basic, but it’s enough for simple image annotations, and it can be handy as part of an image processing pipeline.
Using the paintbox
Use View > Paintbox to open the paintbox bar.
The first box from the left has buttons for paintbox undo and rebo. You can also use ctrl-Z and ctrl-Y as shortcuts.
The next box has a set of radio buttons which set the current tool. From the left they are:
- pointer mode (ie. paintbox is off)
- freehand draw, use the slider to set brush width
- straight line draw, use the slider to set brush width
- draw a box, filled or empty
- draw a circle, filled or empty
- smudge, use the slider to set brush width
- fill until equal to ink
- fill while equal to start pixel
- render text
Normally, nip4 uses mouse drag to pan the image or to move and resize regions. If you hold down shift, it’ll always pan.
Fill until equal to ink is handy for drawing polygons. You can outline a shape in some way, then use fill until to make it solid.
Fill while equal to start pixel is useful for recolouring regions. If you have an area that’s a certain colour, you can select a different colour then use fill-while to change the colour of all connected pixels.
The final box has the tool parameters. From the left they are:
- circles and rectangles can be empty or filled
- the current ink, click to change the ink colour
- brush width for line drawing
- current font for text
- string to draw, can include markup
Snapping
Just like image regions, nip4 brushes all snap against guides. This is a simple way to align paint actions.
Use ctrl-drag up and right to make a vertical guide, and ctrl-drag left and down to make a horizontal guide.
All brushes snap left, centre and right, so you can line up text and graphic annotations in the obvious way.
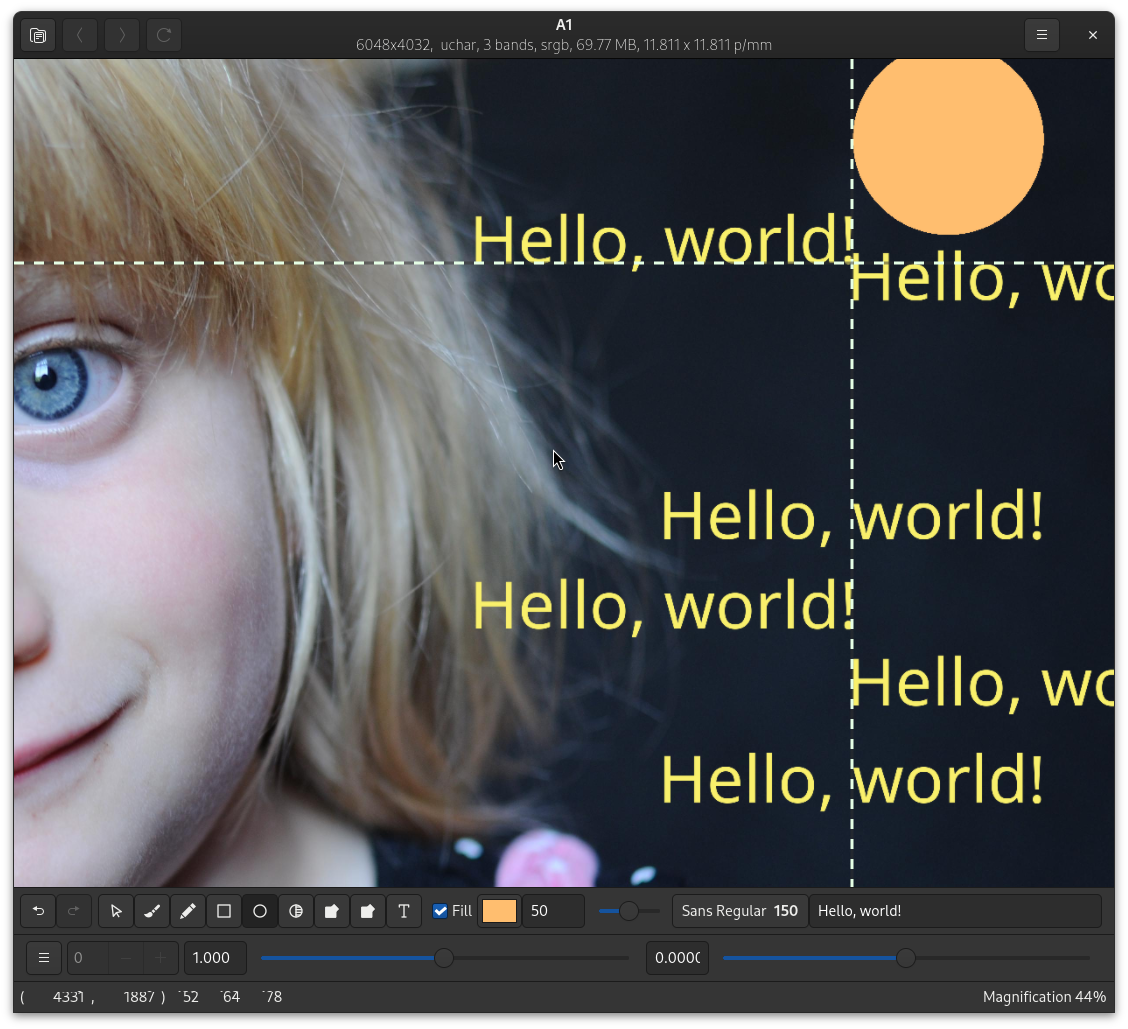
Snap to grid
You can also use the menu items Region > New
> Horizontal guide, and Region > New > Vertical guide, and you can also make
them programmatically with the HGuide and VGUide classes.
For example, you could enter:
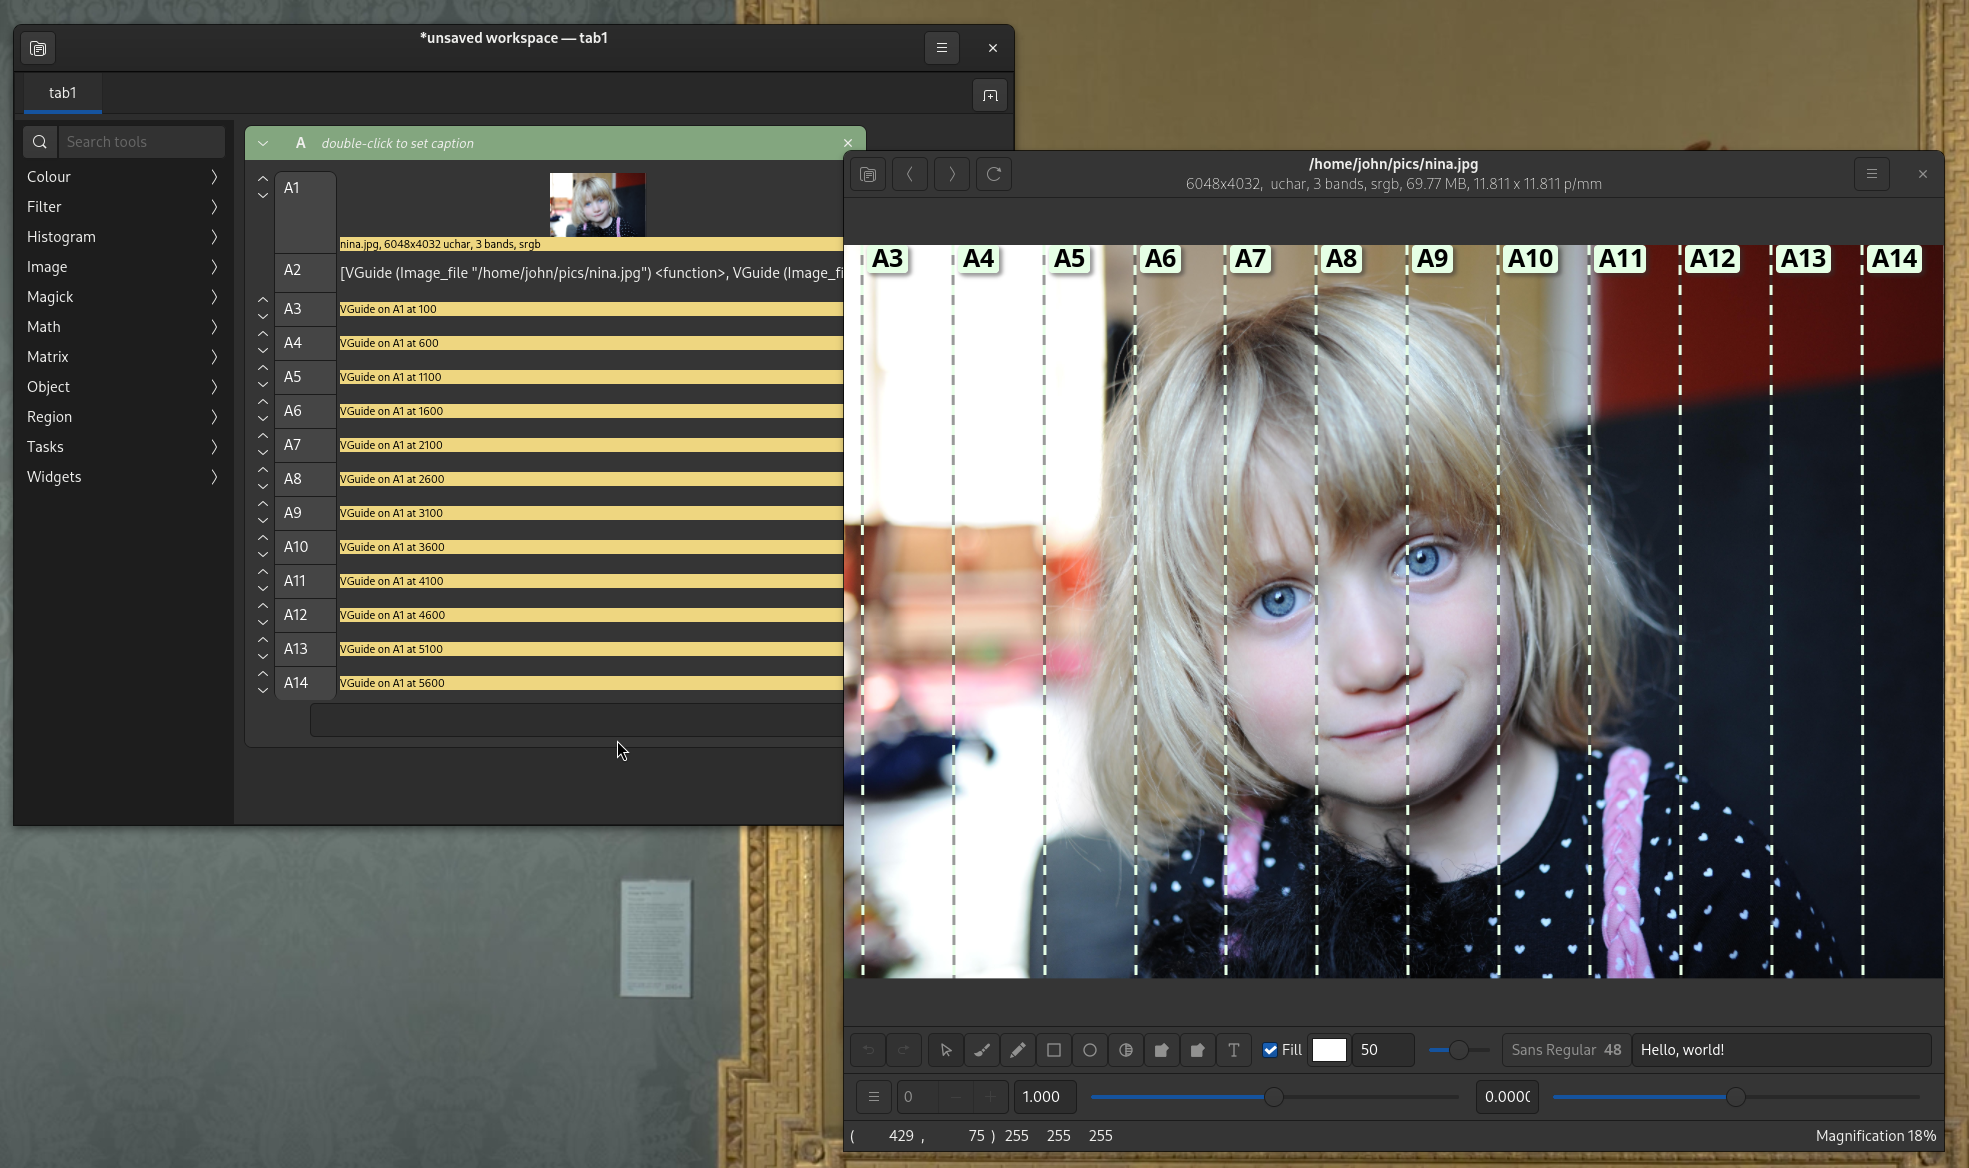
[VGuide A1 x :: x <- [100, 600 ... A1.width]]
To make a list of guides, then right-click on the row label and select Ungroup to make a set of top-level objects.
Painting on a live image
The paintbox is integrated wit nip4’s image recomputation, so you can draw on live images. For example, if you select Filter > Convolution > Canny and turn the scale up, you’ll see the edge detector running on the image you’re modifying.
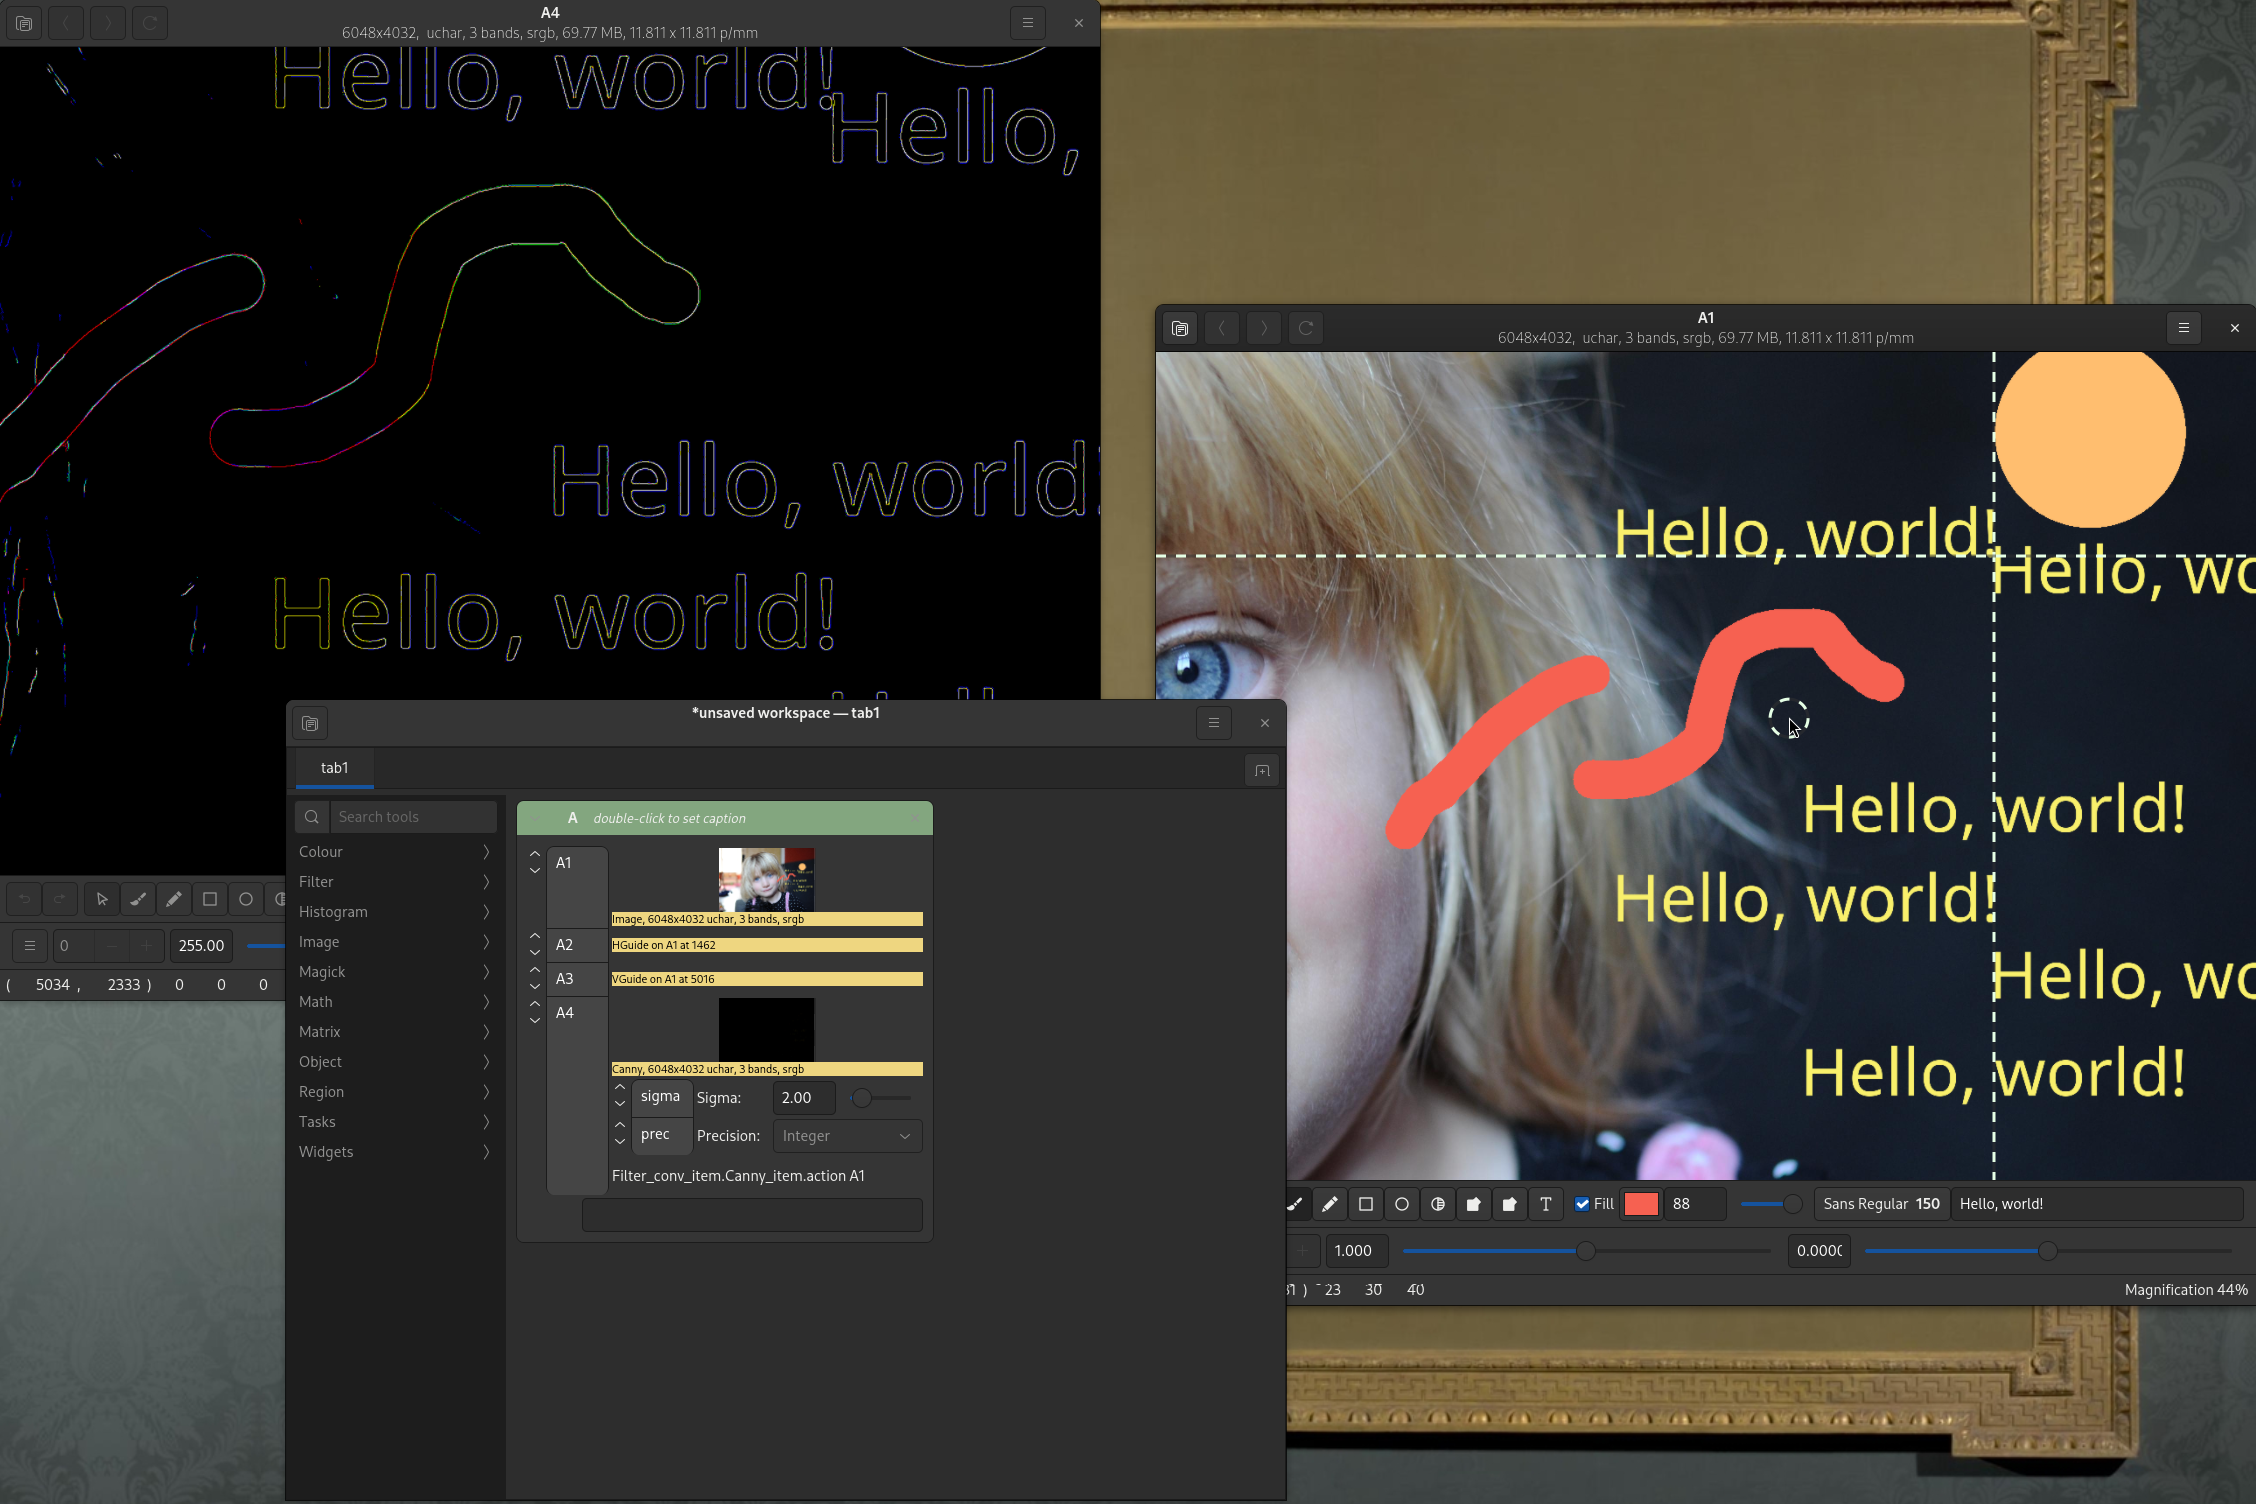
As you paint on the image, the result of the Canny filter will update.
For a more serious example, you can paint on a Fourier-space image. Use Math > Fourier > Forward to make the complex image, then Maths > Fourier > Reverse to go back to real again. As you paint on the Fourier-space image (the smudge tool works well for this), you’ll see the real image updating.
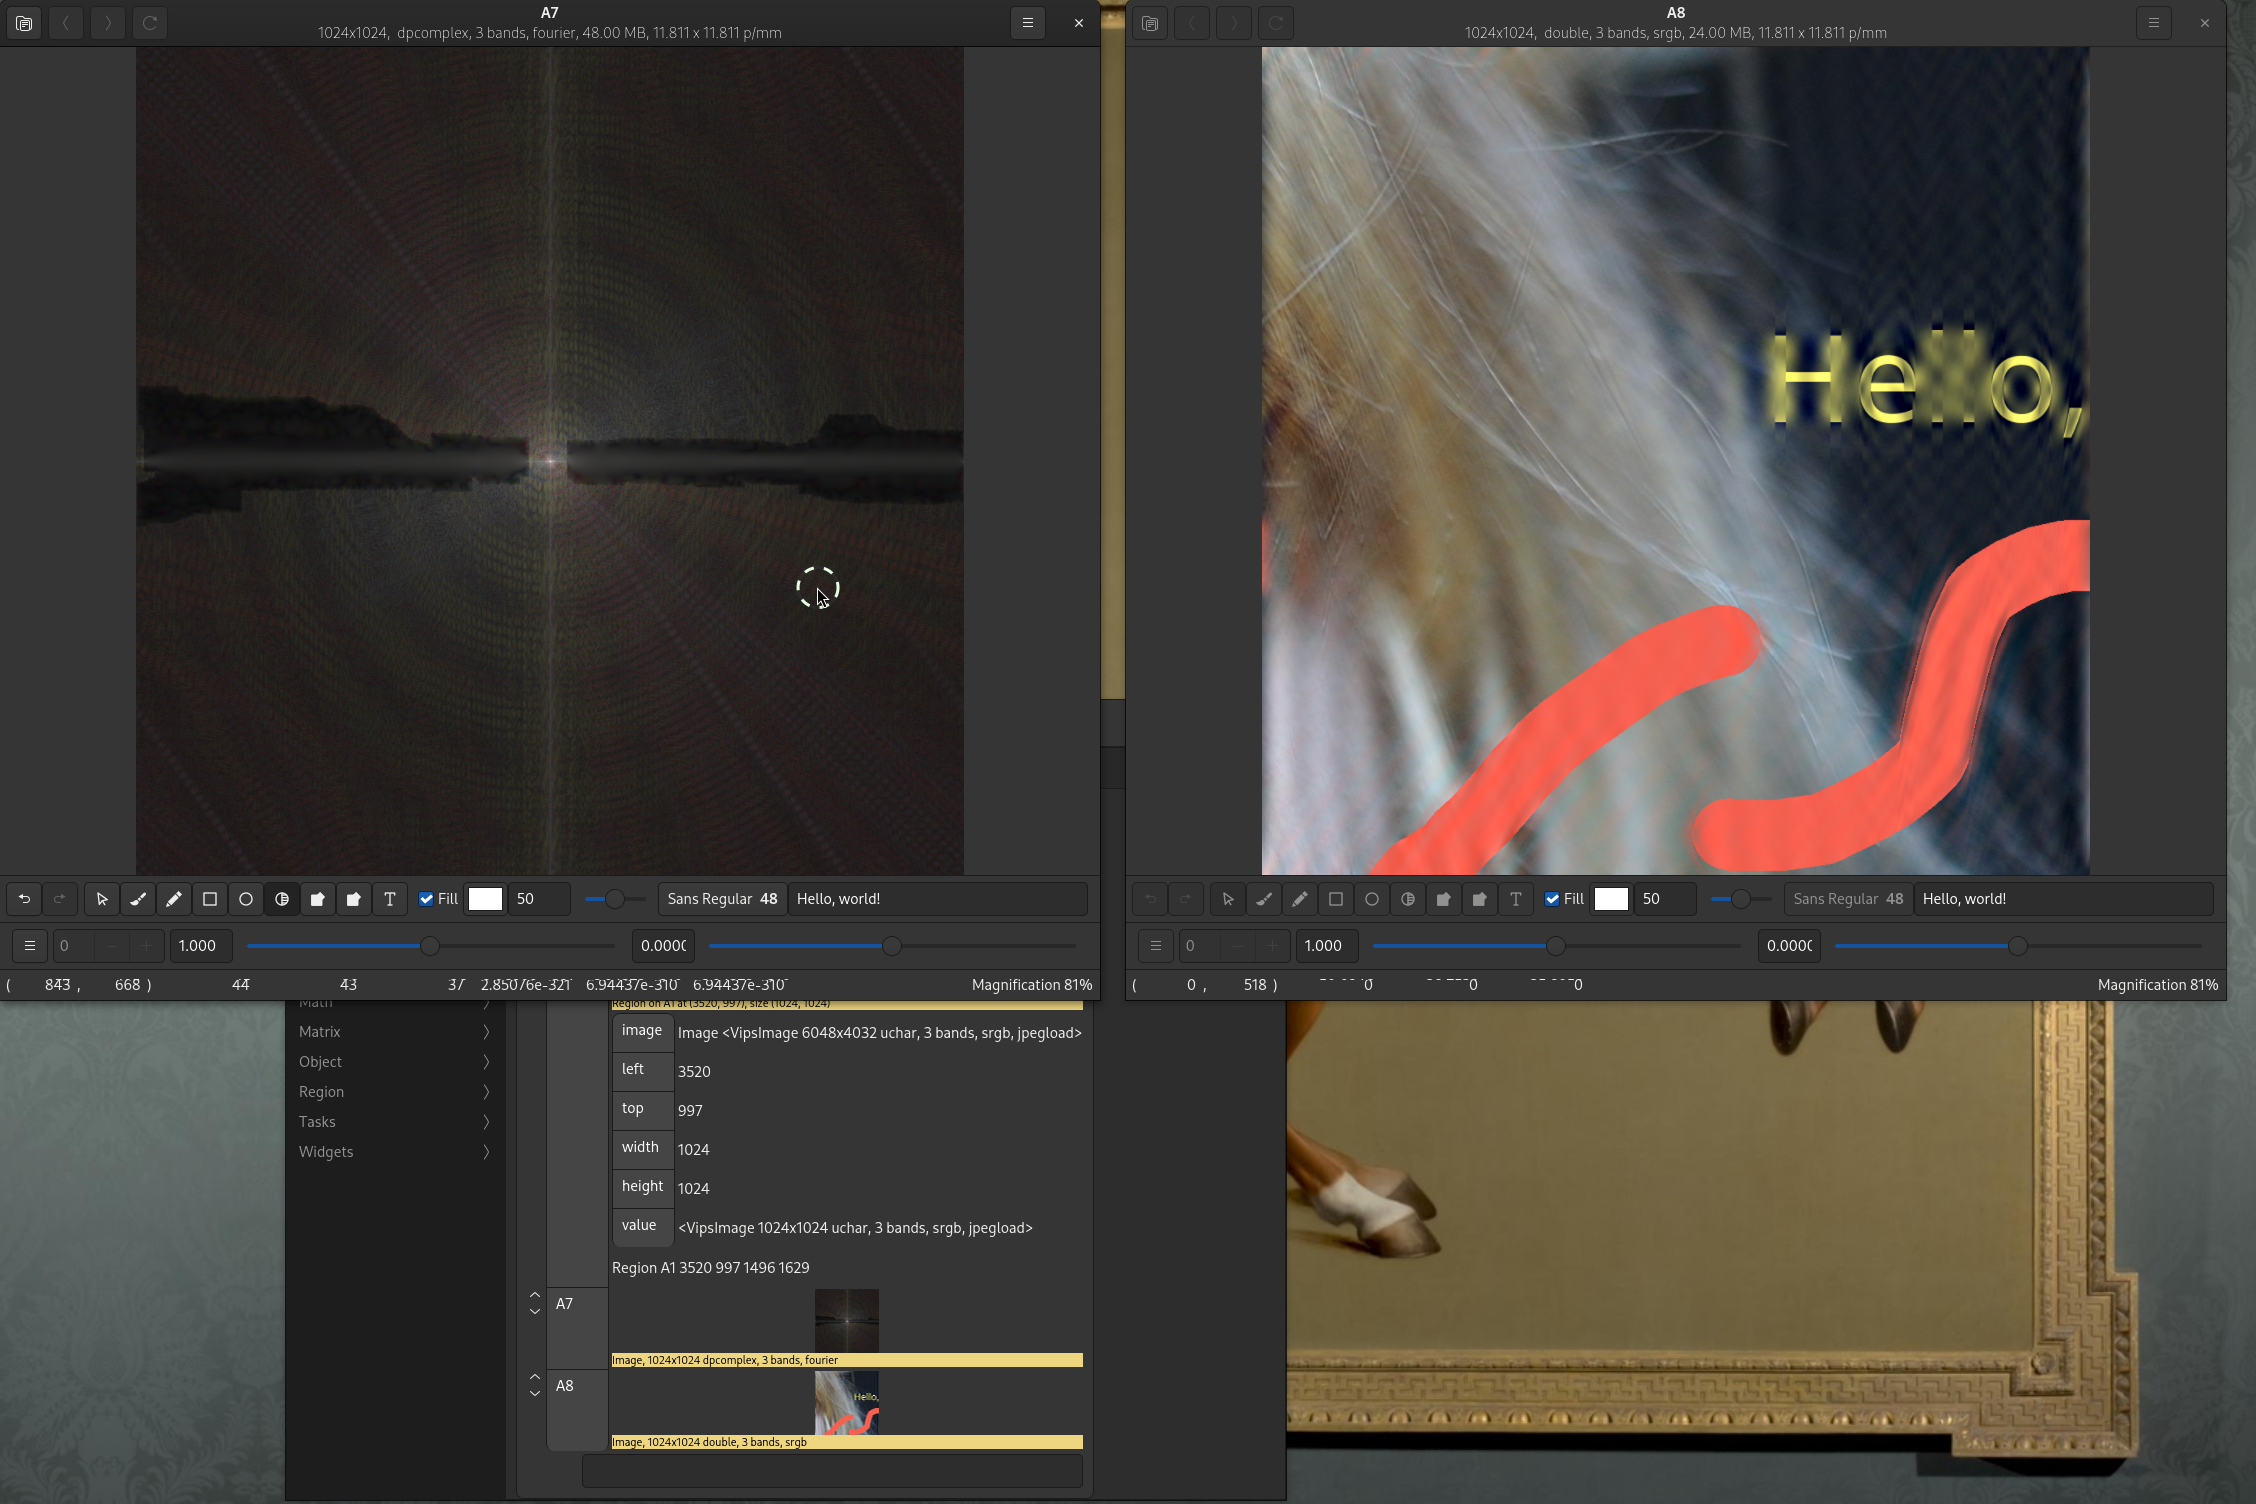
I smudged most of the horizontal frequencies, so this has blurred vertical edges and left horizontal edges alone.
Limitations
There are a few limitations and missing paintbox features:
-
Starting to paint will force the whole image into memory, so you can’t use it on extremely large images. This might change.
-
Ink stays RGB, it should transform to the image colourspace.
-
An ink dropper that let you copy pixel values between images would be very useful.
-
You should be able to paint on multipage and animated images.
Other new features
nip4 9.2.0 has some other new features.
-
It now supports animated PNG, and QOI images.
-
There’s a new Colour > CICP menu that lets you manipulate images with CICP HDR metadata.
-
The Colour > UHDR menu has been expanded.
-
snip now has a
#includecommand. -
A new Tasks > Capture > DCRAW load menu items gives more control over RAW camera import. Image > New > Text has an RGBA toggle.
Plus the usual bugfixes and speedups.